Core Bluetooth fundamentals: discover and connect to BLE devices in SwiftUI
Learn the Core Bluetooth connection flow in SwiftUI, including central and peripheral roles, BLE scanning, device discovery, and connecting to a selected peripheral.
Core Bluetooth gives your iOS app a Swift API for working with Bluetooth Low Energy devices.
You write against Apple’s framework. Core Bluetooth handles the lower layers involved in moving BLE data between your app and nearby hardware.
This guide covers the first part of that job: understanding the central and peripheral roles, scanning for nearby devices, listing what your app discovers, and connecting to the device a user selects.
Watch the full walkthrough here:
Where Core Bluetooth sits
Your app talks to Core Bluetooth rather than implementing the BLE protocol stack itself.
┌──────────────────────┐
│ Your SwiftUI app     │
└──────────┬───────────┘
           │ Core Bluetooth API
┌──────────▼───────────┐
│ Core Bluetooth       │
└──────────┬───────────┘
           │ BLE protocol stack
┌──────────▼───────────┐
│ Nearby BLE hardware  │
└──────────────────────┘
Behind that API sit layers such as GATT, ATT, and L2CAP:
- GATT describes how data is organized through services and characteristics.
- ATT defines operations such as reading and writing attributes.
- L2CAP helps move data between devices.
You can begin scanning and connecting without implementing those layers yourself. Services and characteristics become important when you move from connection to data exchange.
Central and peripheral roles
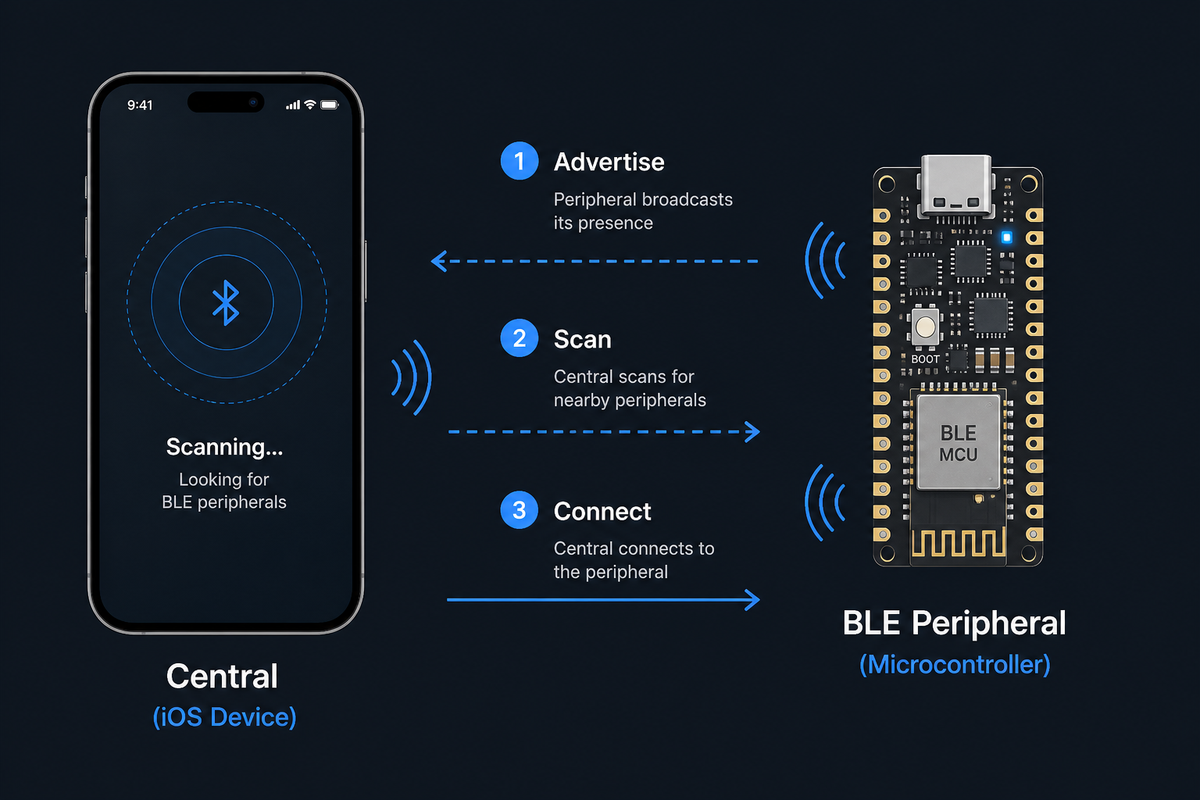
Core Bluetooth uses 2 roles throughout the connection process.
The central is the device searching for and connecting to BLE peripherals. In this project, it’s the iPhone, iPad, or Mac running your app.
The peripheral is the nearby BLE device advertising its presence and exposing data or controls. A sensor or microcontroller can fill this role.
┌─────────────────────┐       scans       ┌─────────────────────┐
│ Central             │ ────────────────▶ │ Peripheral          │
│ iPhone + iOS app    │ ◀──────────────── │ BLE hardware        │
│ Uses the BLE data   │    advertises     │ Exposes capabilities│
└─────────────────────┘                   └─────────────────────┘
Core Bluetooth connects to Bluetooth Low Energy peripherals. Classic Bluetooth devices use a different path and aren’t available through this framework in the same way.
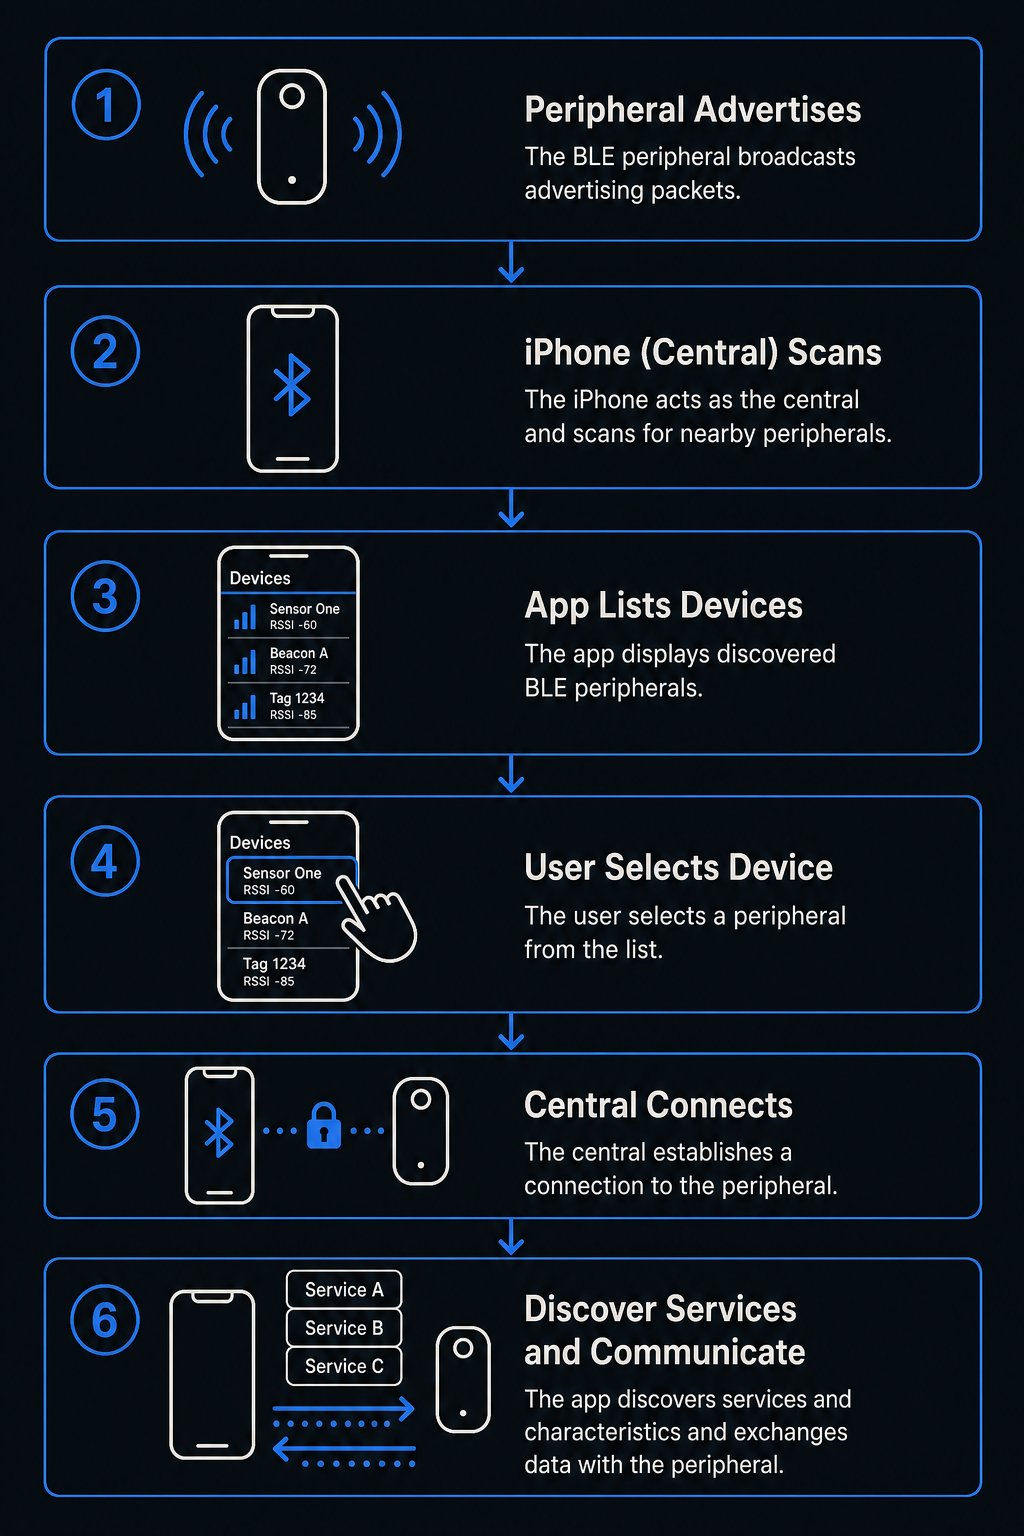
The BLE workflow
A useful mental model has 3 phases:
- Connect to a peripheral.
- Discover its services and characteristics.
- Communicate through read and write operations.
This lesson concentrates on the connection phase.
Peripheral advertises
          │
          ▼
Central scans nearby devices
          │
          ▼
App displays discovered peripherals
          │
          ▼
User selects a device
          │
          ▼
Central connects
          │
          ▼
Service and characteristic discovery
          │
          ▼
Read and write data
The app begins with a scan. As Core Bluetooth reports peripherals, the app stores each device and updates the SwiftUI list. Selecting a row starts the connection.
Add the Bluetooth permission description
Add the NSBluetoothAlwaysUsageDescription key to the app’s Info property list and provide a clear explanation for the permission prompt.
The message should tell the user why the app needs Bluetooth access. The video demonstrates where to add this key in Xcode and explains what happens when it’s omitted.
Model each discovered device
A small model can hold the data the interface needs:
struct Device: Identifiable {
    let id: UUID
    let name: String
    let peripheral: CBPeripheral
}
The identifier lets SwiftUI distinguish rows. The name is shown in the list. The CBPeripheral reference is retained so the manager can connect when the user makes a selection.
Some advertisements don’t contain a name. Give those peripherals a readable fallback in the interface.
Build the Bluetooth manager
The manager owns the Core Bluetooth work and the state consumed by SwiftUI. Its responsibilities include:
- Holding a
CBCentralManager - Tracking the central manager’s current state
- Tracking whether a scan is active
- Storing discovered devices
- Retaining the connected device
- Starting and stopping scans
- Connecting to a selected peripheral
A compact shape looks like this:
@MainActor
@Observable
final class BluetoothManager: NSObject {
    private var central: CBCentralManager!

    var state: CBManagerState = .unknown
    var isScanning = false
    var devices: [Device] = []
    var connectedDevice: Device?

    override init() {
        super.init()
        central = CBCentralManager(delegate: self, queue: nil)
    }
}
The video walks through the full implementation and shows how each property feeds the interface.
Start and stop scanning
Before a new scan, clear the previous results. Then ask the central manager to scan and update the state used by the view.
func startScanning() {
    devices.removeAll()
    central.scanForPeripherals(withServices: nil)
    isScanning = true
}

func stopScanning() {
    central.stopScan()
    isScanning = false
}
Passing nil for the service filter discovers nearby advertising peripherals rather than limiting results to a supplied service list.
Handle central-manager callbacks
Your manager adopts CBCentralManagerDelegate. The delegate callbacks drive the app as Bluetooth conditions change.
Track Bluetooth state
centralManagerDidUpdateState(_:) reports states such as powered on, powered off, unsupported, unauthorized, resetting, and unknown.
func centralManagerDidUpdateState(_ central: CBCentralManager) {
    state = central.state
}
A small extension can convert those enum cases into labels for the interface. This gives the user immediate feedback when Bluetooth is unavailable or permission hasn’t been granted.
The simulator can report Bluetooth as unsupported, so use suitable hardware when testing device discovery.
Store discovered peripherals
The discovery callback supplies the peripheral, its advertisement data, and its RSSI value.
func centralManager(
    _ central: CBCentralManager,
    didDiscover peripheral: CBPeripheral,
    advertisementData: [String: Any],
    rssi RSSI: NSNumber
) {
    let device = Device(
        id: peripheral.identifier,
        name: peripheral.name ?? "No name",
        peripheral: peripheral
    )

    guard !devices.contains(where: { $0.id == device.id }) else { return }
    devices.append(device)
}
The identifier check prevents repeated advertisements from creating duplicate rows.
Connect to a selection
Once the user chooses a device, pass its stored peripheral to the central manager:
func connect(to device: Device) {
    central.connect(device.peripheral)
}
When the connection succeeds, find the matching device, store it as the active connection, and stop scanning.
func centralManager(
    _ central: CBCentralManager,
    didConnect peripheral: CBPeripheral
) {
    connectedDevice = devices.first { $0.id == peripheral.identifier }
    stopScanning()
}
Stopping the scan after connection keeps the app focused on the selected peripheral.
Connect the manager to SwiftUI
The view reads the manager’s observable state and redraws when that state changes.
A basic interface needs:
- A label for the central manager state
- A scan or stop button
- A list of discovered devices
- A connection status label
┌────────────────────────────────┐
│ Bluetooth: Powered on          │
│ Connected: BLE Sensor          │
│                                │
│ [ Stop scanning ]              │
│                                │
│ Nearby devices                 │
│ ┌────────────────────────────┐ │
│ │ BLE Sensor                │ │
│ ├────────────────────────────┤ │
│ │ No name                   │ │
│ └────────────────────────────┘ │
└────────────────────────────────┘
Each device row can call connect(to:). The button switches between scanning and stopping according to isScanning.
Keep the first build small
A first Core Bluetooth app only needs to prove this chain:
Permission granted
      ↓
Central powered on
      ↓
Scan started
      ↓
Peripheral discovered
      ↓
Device listed
      ↓
Connection succeeds
Once that works, continue into service discovery, characteristic discovery, and data exchange.
For the complete code walkthrough and the working SwiftUI interface, watch the video above or open it on YouTube:
https://www.youtube.com/watch?v=pv6Cxufn6sQ
And if you want a ready-made path from an iOS app to microcontroller hardware, get the free Core Bluetooth Starter Kit. It covers building a Swift or SwiftUI app that talks to devices such as an ESP32, Arduino, or Raspberry Pi:
https://whop.com/coding-on-crack/free-resources-a7/